OK first of all, we do not iron the pleats of a kilt. We press them with high heat and a lot of pressure. That is what sets the creases.
But first -- and this is the most important part. You baste the pleats into their correct position first. Basting is one of those things that everyone hates and avoids at first. Now, I actually like basting.
The advantage of basting over pinning is that you can press right down on and over the basting without leaving the bumps that pins leave.
With a tape measure find the width of the pleat up at the bottom of the Fell (this is the hip line or the bottom of where the pleats are sewn down and tapered.)
You are looking at two things. You want your crease to go straight down and follow the Tartan pattern. If a line is a certain distance from the edge of the pleat up at the Fell it must be the same distance from the edge of the pleat all the way down to the hem.
And the width of each pleat must be the same all the way from the Fell down to the hem. The cross section of the pleated part of a kilt is a section of a cylinder.
You baste to keep the Tartan pattern straight down each pleat and the width of each pleat the same from Fell to hem.
Once the pleats are basted (and you use as many horizontal lines of basing stitches as necessary to hold the pleats in position.) the kilt will no longer lay flat. The Fell area must be lifted or draped over the edge of your pressing table with the pleats perfectly straight, flat and smooth.
This is what a basted kilt looks like ready to press. (note - the single line of pins at the hem is where I am putting the final line of basting stitches.)
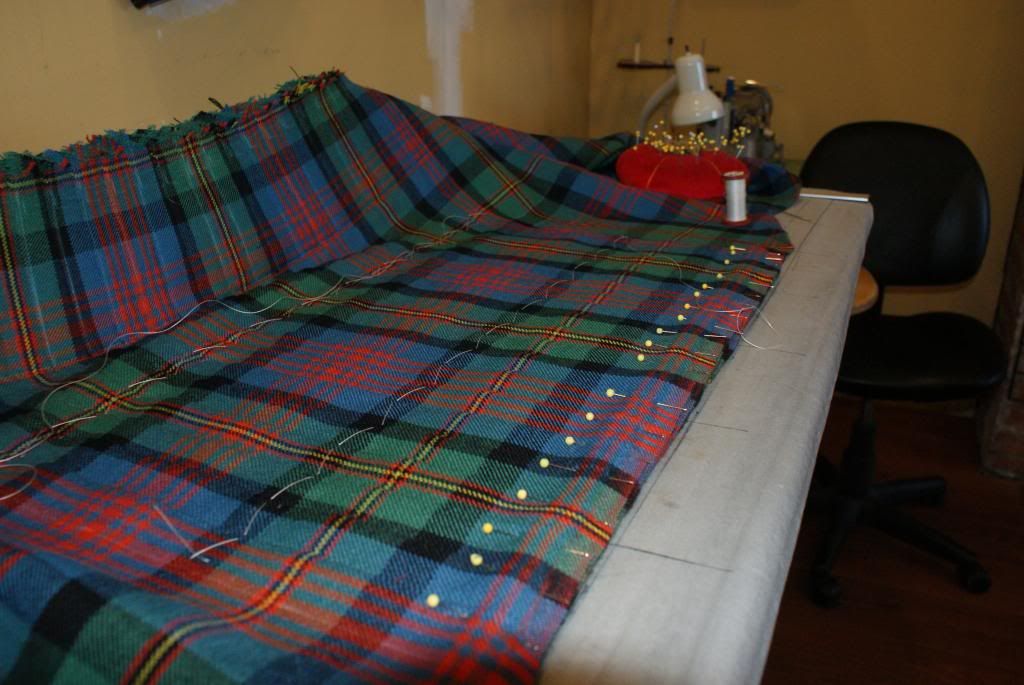
Notice that the hem line is now a straight line and not a curve.
Now to press the creases.
You need an iron that is set to the wool setting and that can create steam. It is the heat provided by the steam and not the heat of the iron's sole plate that softens the wool fibers.
You will need a pressing cloth (a pillow case works well) or a teflon protective sole plate on your iron.
NEVER PUT YOUR HOT IRON DOWN IN DIRECT CONTACT WITH YOUR EXPENSIVE WOOL!
Spritz your pressing cloth to create more steam.
You do not move the iron back and forth. You place the iron down on your pressing cloth. The heat of the iron only creates steam.
As the wool fibers soften you will see the pleats start to lay down flatter. Then get right up on top of the iron and press straight down to set the creases.
Then pick the iron straight up, move to a new spot and set it straight back back down to create more steam and set the next area of pleat creases.
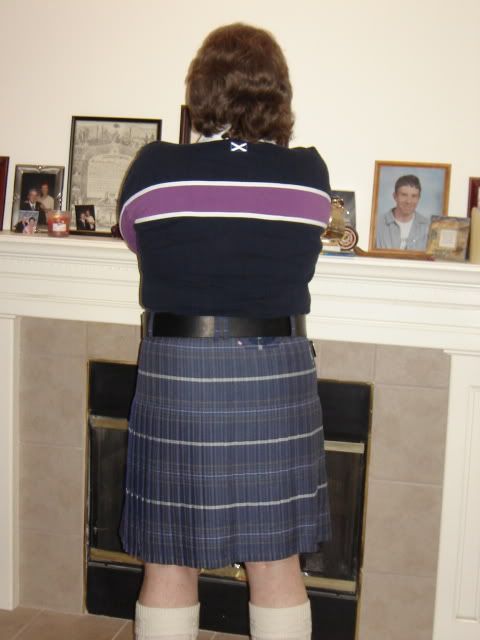
In the back of a well pressed kilt all the pleats should hang straight and parallel without any shower curtain waves.
Steve Ashton
www.freedomkilts.com
Skype (webcam enabled) thewizardofbc
I wear the kilt because: Swish + Swagger = Swoon.


Bookmarks