X Marks the Scot - An on-line community of kilt wearers.

   X Marks Partners - (Go to the Partners Dedicated Forums )
USA Kilts website Celtic Croft website Celtic Corner website Houston Kiltmakers

User Tag List

Page 2 of 4 FirstFirst 1234 LastLast
Results 11 to 20 of 44

Hybrid View

  1. #1
    Join Date
    19th May 08
    Location
    Oceanside CA
    Posts
    3,491
    Mentioned
    0 Post(s)
    Tagged
    0 Thread(s)
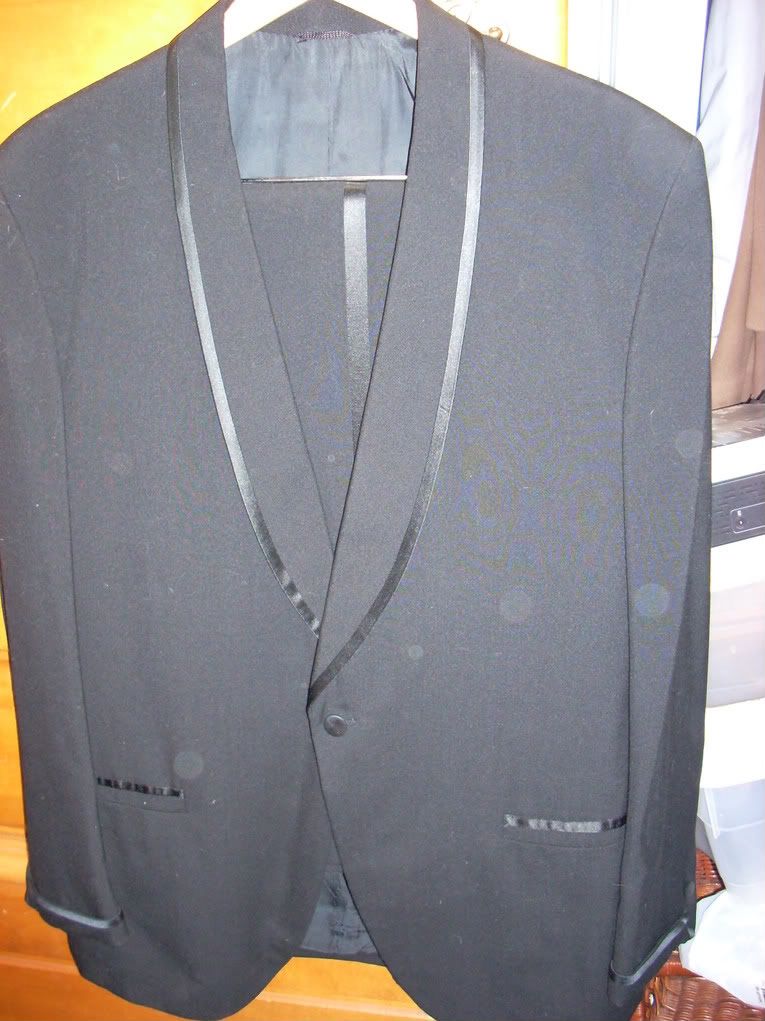
    Now the real fun part -- the front cutaway. I'd chalked a line based on borrowed PC, then modified it to accommodate the end of lapel's satin edging. Here, I've cut a piece of legal-sized paper to align with the chalk mark and make my pattern.


    My pattern represents the finished line I want, so I have to cut outside the pattern for some hem allowance. Here I'm using a seam gauge to cut one inch outside my pattern. Lot of allowance, but it's easier to trim it narrower than to make it wider after cutting


    Note that I've only cut the outermost layer of wool at this time -- leaving all the gizzards intact to be dealt with later.


    You can't tell in this light, but the pattern is still pinned in place. I've turned the jacket upside down and am folding the hem allowance in, pressing in little bits as I go.


    Then I pressed the entire curve from the right side, using a pressing cloth to avoid creating a shiny surface on wool (no pics, really nothing to see there folks).

    Here is the first curve pressed into place, next to the uncut side of jacket.
    Proudly Duncan [maternal], MacDonald and MacDaniel [paternal].

  2. #2
    Join Date
    19th May 08
    Location
    Oceanside CA
    Posts
    3,491
    Mentioned
    0 Post(s)
    Tagged
    0 Thread(s)
    Same process for the other side, flipping the paper pattern over to create mirror image. Well, almost mirror -- here's my first try.


    I wasn't happy with the little pointy edges along that second curve, so I pressed those areas flat and tried again. Still not as smooth a curve but better, I think.


    Now to deal with all those inner layers. First, pockets marked for machine stitching (to shorten them to new length of jacket -- I'm taking 3.5 inches off the bottom hem).


    And a pocket stitched and trimmed to its new length.
    Proudly Duncan [maternal], MacDonald and MacDaniel [paternal].

  3. #3
    Join Date
    22nd November 07
    Location
    US
    Posts
    11,355
    Mentioned
    0 Post(s)
    Tagged
    0 Thread(s)
    Ah! The discription of the epaulettes procedure makes perfect sense now.
    I tried to ask my inner curmudgeon before posting, but he sprayed me with the garden hose…
    Yes, I have squirrels in my brain…

  4. #4
    Join Date
    15th April 07
    Location
    State College, PA
    Posts
    2,426
    Mentioned
    0 Post(s)
    Tagged
    0 Thread(s)
    Yup, great start. um, need to cut the inards...
    Wallace Catanach, Kiltmaker

    A day without killting is like a day without sunshine.

  5. #5
    Join Date
    15th April 07
    Location
    State College, PA
    Posts
    2,426
    Mentioned
    0 Post(s)
    Tagged
    0 Thread(s)
    Hey, you posted while I was... ok inards trimmed... The rounded taper is difficult to make even. I usually press after sewing the curve, don't know if this would help but it works for me.
    Wallace Catanach, Kiltmaker

    A day without killting is like a day without sunshine.

  6. #6
    Join Date
    22nd November 07
    Location
    US
    Posts
    11,355
    Mentioned
    0 Post(s)
    Tagged
    0 Thread(s)
    Sounds good, and quite a bit like the sport jacket conversions work.

    I extended my vent flaps to the center of the back, then attached their upper corners to a tab I sewed to the center seam allowances. I can see how what you did would work too.
    Last edited by Bugbear; 3rd March 09 at 10:53 PM.
    I tried to ask my inner curmudgeon before posting, but he sprayed me with the garden hose…
    Yes, I have squirrels in my brain…

  7. #7
    Join Date
    19th May 08
    Location
    Oceanside CA
    Posts
    3,491
    Mentioned
    0 Post(s)
    Tagged
    0 Thread(s)
    Quote Originally Posted by Ted Crocker View Post
    Sounds good, and quite a bit like the sport jacket conversions work.

    I extended my vent flaps to the center of the back, then attached their upper corners to a tab I sewed to the center seam allowances. I can see how what you did would work too.
    So far, it is much like a sports jacket conversion. My big challenge will be the "dressy" parts -- pocket flap and cuff treatments -- as I still don't know what will look best with the shawl collar. I'll be working on those later today, after a bunch of errands this morning.

    Full-width vent flaps, eh? Interesting solution to the problem. I think it would add too much bulk to this jacket, but I'll keep it in mind for heavier tweeds.

    I did nip in the waist, too, as MoR suggested. Probably nipped in too much over too short a run, but it will stay that way, not going to rip out and re-do it. I know it will look better after a good press and with lining adjusted to match the new curve.

    On with the day!
    Proudly Duncan [maternal], MacDonald and MacDaniel [paternal].

  8. #8
    Join Date
    19th May 08
    Location
    Oceanside CA
    Posts
    3,491
    Mentioned
    0 Post(s)
    Tagged
    0 Thread(s)
    Today's mantra was "work more, post less" so I have a lot of catching up to do!

    Lining: trimmed to about 1.5 inches longer than hemmed jacket. Turned up and pressed a 1/2 inch hem allowance. . .


    Aligned that edge just above jacket hem. This leaves an extra fold of lining for ease of movement.


    I had to get a little creative with this treatment around the side vents and flaps. I ended up leaving the lining loose (not sewn at hem) for about 2 inches either side of vent, folding up the excess lining, and whip-stitching the vertical edge of the fold. This is still problematic. The fold wants to unfold at center rear, so I will probably give it a loose tack (like an inch of "leash") at center back. Not elegant, but effective -- I hope!

    On to the sleeves. I stuffed one sleeve with a bath towel to make measurements easier. I decided that my cuff would be 4 inches at its shortest, and come to a 7 inch point. So I put a pin at the underarm sleeve at the 4 and 7 inch marks.


    This allowed me to measure sleeve circumference at the hem, at the 4 inch height, and at the 7 inch height.


    Using those measurements, I began to draw out the cuff pattern on a large piece of paper. I used a Macy's shopping bag -- I have lots of those, just ask Bob! Midway through pattern making, I decided the cuff's lowest point should be 3 inches rather than 4. Didn't bother to remeasure circumference, just drew an angled, vertical line between my hem level and 7 inch level ticks. I started with a gentle curve between the high and low points of cuff.


    Cut out that pattern and pinned it to one sleeve to see how it looked.
    Proudly Duncan [maternal], MacDonald and MacDaniel [paternal].

  9. #9
    Join Date
    19th May 08
    Location
    Oceanside CA
    Posts
    3,491
    Mentioned
    0 Post(s)
    Tagged
    0 Thread(s)
    Decided to try a straight edge for top of cuff rather than the curve. Taped some paper onto the top of the pattern, marked a straight line, cut the revised pattern, and pinned it into place. Much better!


    I have the luxury of donor pants from this full tuxedo, lots of material to play with. The pants have a line of satin down the outside seam, and I toyed with the idea of placing that satin trim up the cuff from hem to highest point.


    Decided against it, as the satin would look odd just ending in mid-sleeve. The ultimate treatment would be edging the cuff in satin, but that is much more work than I have time for!

    The pants legs were just the right size for cuffs -- I'm using the existing pants hem as the bottom hem of cuff. Yes, Bob will be wearing his pants around his wrists -- please try to control your laughter. Here, I have chopped off the bottom 8 inches of pants leg, opened it up along the outside seam (where the satin is), pressed it flat, and laid my pattern in place.


    Sharp eyes will notice that my pattern has changed slightly. I drew it with the high points at either end and the low point in the middle, but I don't want a seam up the high point. So I cut the pattern in half at the low point, and taped it together at the high points.

    Remember, you need mirror image cuffs, so one is cut with the Macy's logo showing and the other was cut with the Macy's logo hidden underneath.

    The pattern also doesn't perfectly match the pants hem along the bottom. I'm leaving the pants hem as is, trusting that it is a more level hem than my pattern
    Proudly Duncan [maternal], MacDonald and MacDaniel [paternal].

  10. #10
    Join Date
    19th May 08
    Location
    Oceanside CA
    Posts
    3,491
    Mentioned
    0 Post(s)
    Tagged
    0 Thread(s)
    Remember that the paper pattern represents finished size, so I cut the material 1/2 inch outside the edge of pattern.


    Then I pressed that 1/2 inch under, to finish the raw edges of the cuff.


    The existing sleeves have a small vent, which I stitched closed to prevent it bunching up underneath the applied cuff.


    Pinned the cuff to the sleeve, first along the hem (with new cuff hem about 1/8 inch below the existing sleeve hem).


    Then pinned the upper edges of the cuff to the sleeve.
    Proudly Duncan [maternal], MacDonald and MacDaniel [paternal].

Page 2 of 4 FirstFirst 1234 LastLast

Similar Threads

  1. Jacket for conversion
    By svc40bt in forum Kilt Advice
    Replies: 5
    Last Post: 13th October 08, 03:20 AM
  2. First Jacket Conversion
    By Kerr the Walker in forum DIY Showroom
    Replies: 8
    Last Post: 26th July 08, 06:54 PM
  3. Jacket Conversion
    By Aracos mac Domhnaill in forum How to Accessorize your Kilt
    Replies: 11
    Last Post: 9th July 08, 06:38 PM
  4. Jacket conversion!
    By beloitpiper in forum DIY Showroom
    Replies: 26
    Last Post: 21st January 08, 07:27 AM
  5. Jacket conversion
    By turpin in forum How to Accessorize your Kilt
    Replies: 5
    Last Post: 19th November 07, 09:47 AM

Bookmarks

Posting Permissions

  • You may not post new threads
  • You may not post replies
  • You may not post attachments
  • You may not edit your posts
  •  

» Log in

User Name:

Password:

Not a member yet?
Register Now!
Powered by vBadvanced CMPS v4.2.0